[WEB] web push, 이렇게 쉬운거였어?
사용자들에게 푸쉬 알림을 보내고 싶은데..
앱 개발 안해도 푸쉬 알림을 보낼 수 있습니다!
🔑웹 푸쉬 구현에 앞서.. 웹 푸쉬 구현에 앞서 실습 환경은 아래와 같습니다.
Vue (v3.3.4)
Node
Firebase firestore
( 모바일 기준 )
📃구독 부탁드립니다. 갑자기 구독이요..?
웹 푸쉬는 구독을 한 사용자에게 토큰값을 얻어서 보내야 합니다.
구독 버튼을 만들기 위해서는 Service Worker 와 PushManager 를 사용해야합니다.
Vue 프로젝트의 /public 폴더에 service-worker.js 파일을 만들어줍니다.
1 2 3 4 5 6 7 8 9 10 11 12 13 14 15 16 17 18 self.addEventListener ("push" , (event ) => { const text = event.data .text (); event.waitUntil ( self.registration .showNotification ("웹 푸쉬!" , { body : text, data : { url : "https://github.io/ParkBeomMin/WebPushExample" , }, }) ); }); self.addEventListener ("notificationclick" , function (event ) { event.notification .close (); event.waitUntil (clients.openWindow (event.notification .data .url )); });
push와 notificationclick 이벤트를 등록시켜줍니다.
이제 HomeView.vue 파일로 이동하여 구독 버튼과 service worker 파일을 등록하고 구독을 할 수 있는 기능을 구현해보겠습니다.
1
2
3
4
5
<template> <div > <button @click ="requestPermission" > {{ buttonText }}</button > </div > </template>
버튼은 위와 같이 만들고, buttonText는 구독과 구독해지를 위해 변화될 수 있도록 했습니다.
1
2
3
4
5
6
7
8
9
10
11
12
13
14
15
16
17
18
19
20
21
22
23
24
25
26
27
... const buttonText = ref ('' );onMounted (async () => { if ('serviceWorker' in navigator) { const workerFile = '/service-worker.js' ; try { const registration = await navigator.serviceWorker .register (workerFile); if (registration) { const subscription = await registration.pushManager .getSubscription (); if (subscription) { buttonText.value = '구독 해지하기' ; } else { buttonText.value = '구독하기' ; } } } catch (e) { console .error (e.message ); } } else { console .error ('Service Worker in navigator error' ); } }); ...
이제 service worker가 등록이 되었으니, 구독 요청 기능을 구현해보겠습니다.
1
2
3
4
5
6
7
8
9
10
11
12
13
14
15
16
17
18
19
20
21
22
23
24
25
26
... const requestPermission = async ( try { const registration = await navigator.serviceWorker .ready ; const subscription = await registration.pushManager .getSubscription (); if (subscription) { buttonText.value = '구독하기' ; subscription.unsubscribe (); } else { const subscription = await registration.pushManager .subscribe ({ userVisibleOnly : true , applicationServerKey : vapidKey.value , }); console .log ('subscription => ' , subscription.toJSON ()); buttonText.value = '구독 해지하기' ; } } catch (e) { console .error (e.message ); } }; ...
요청은 service worker가 등록되고 준비가 된 이후 pushManager의 getSubscription()를 통해 구독정보를 가져옵니다.vapidKey.value 이 친구가 나타났는데 푸쉬 발송을 위한 키값입니다. 이 키값은 서버단에서 만들어야합니다.
이제 Node 프로젝트로 이동합니다.
npm install -g web-pushweb-push generate-vapid-keys
1
2
3
4
5
6
7
8
9
======================================= Public Key: BAHc42Ge9Ku-Hgup-66JXrkbsWuwDTUTnoh0Y5UyQFyS04UbP7NF02ZfOMMDf2ujLTMIfKlQ4cx4Thz8ek6hze8 Private Key: TdolN_-xYH9ARuWRDULgaXO-EFgadIM39FhCSttwswc =======================================
위 명령어를 통해 web-push를 설치하고, vapid key 값을 발급받습니다.vapidKey.value에 넣어줍니다.
1
2
3
const vapidKey = ref ( "BAHc42Ge9Ku-Hgup-66JXrkbsWuwDTUTnoh0Y5UyQFyS04UbP7NF02ZfOMMDf2ujLTMIfKlQ4cx4Thz8ek6hze8" );
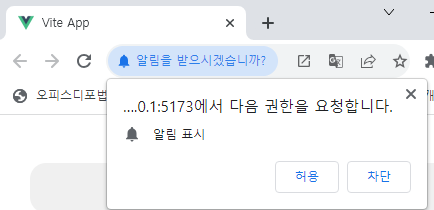
이제 구독 버튼을 눌러보면 아래와 같이 알림 요청과 구독 정보를 받아올 수 있습니다.
이 구독 정보를 가지고 다시 Node 프로젝트로 이동합니다.npm install --save web-push
라이브러리 설치 후 vapid키와 구독정보를 포함해 푸쉬 발송 로직을 만들어줍니다.
1
2
3
4
5
6
7
8
9
10
11
12
13
14
15
16
17
18
19
20
21
22
23
24
25
const webpush = require ("web-push" );const vapidKeys = { publicKey : "BAHc42Ge9Ku-Hgup-66JXrkbsWuwDTUTnoh0Y5UyQFyS04UbP7NF02ZfOMMDf2ujLTMIfKlQ4cx4Thz8ek6hze8" , privateKey : "TdolN_-xYH9ARuWRDULgaXO-EFgadIM39FhCSttwswc" , }; webpush.setVapidDetails ( "mailto:bmpark@jinhak.com" , vapidKeys.publicKey , vapidKeys.privateKey ); webpush.sendNotification ( { endpoint : "https://fcm.googleapis.com/fcm/send/cRngP9o7apw:APA91bG5_i-BS2WBUSehlWxe4Pr2PLhugyvCtIcNgFSs2RcSSth60wmC61R9SH-Iq3tFpO1tqprXcFFze4ZduL-MsSGWP9DJvm7jEbWB3nM40Ui99VFNPsnoHUx-emEceevzR6vwATMn" , keys : { auth : "BjJjTUVFQi9UCBH-VqqVAg" , p256dh : "BDDJ_YGSawW1NowpbJ1Cl0N8JiFtsSuMBjjtWCly7lBrf4wnsrJP7xlVTqBKhhaMIP3RwkCfb5oSSwDVh1fbYp4" , }, }, "웹푸쉬발송!" );
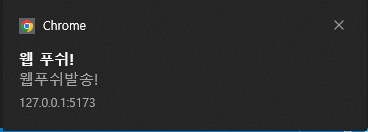
이제 node index.js로 서버를 실행시키면 웹 푸쉬 발송을 확인할 수 있습니다!
💻RESTFul한 WebPush로! 위에서 단순히 웹 푸쉬가 동작하는 것까지 했으니, 이제 db도 연결하고 서버 api로 웹 푸쉬가 발송될 수 있도록 해보겠습니다.
npm install express --savenpm install firebase-admin --save
firebase console에서 키값 파일도 다운로드 받아놓습니다.
이제 기본적인 셋팅은 완료가 되었고, 구조를 잡고 구현을 합니다.
1
2
3
4
5
6
7
8
├── routes │ ├── index.js │ └── webPush.js ├── firebase-account-file.json ├── firebase.js ├── index.js ├── webPush.controller .js └── package.json
기존 index.js의 webPush 기능들은 webPush.controller.js파일로 변경했습니다.
먼저 index.js 파일은 기본적인 express 라우팅 처리를 해줍니다.
1
2
3
4
5
6
7
8
9
10
const express = require ("express" );const app = express ();app.use (express.urlencoded ({ extended : false })); app.use (express.json ()); const index = require ("./routes/index" );app.use ("/" , index); app.listen (3000 , () => console .log ("WebPush Server On 3000 Port" ));
webPush.controller.js에서는 vapidkey와 push를 보내는 함수를 export시켜줍니다.
1
2
3
4
5
6
7
8
9
10
11
12
13
14
15
16
17
18
19
20
21
22
23
24
25
26
27
28
29
const webpush = require ("web-push" );const vapidKeys = { publicKey : "BAHc42Ge9Ku-Hgup-66JXrkbsWuwDTUTnoh0Y5UyQFyS04UbP7NF02ZfOMMDf2ujLTMIfKlQ4cx4Thz8ek6hze8" , privateKey : "TdolN_-xYH9ARuWRDULgaXO-EFgadIM39FhCSttwswc" , }; webpush.setVapidDetails ( "mailto:club20608@gmail.com" , vapidKeys.publicKey , vapidKeys.privateKey ); const getVapidKey = ( return vapidKeys.publicKey ; }; const push = ({ data, tokens } ) => { tokens.forEach (async (token) => { try { await webpush.sendNotification (token, data.message ); } catch (e) { console .error (e); } }); }; module .exports = { getVapidKey, push };
firebase.js에서는 firebase를 초기화하고 firestore db와 통신하는 기능들을 구현합니다.
1
2
3
4
5
6
7
8
9
10
11
12
13
14
15
16
17
18
19
20
21
22
23
24
25
26
27
28
29
30
31
32
33
34
35
36
37
38
39
40
41
42
43
44
45
46
47
48
49
50
51
52
53
54
55
56
57
58
59
60
61
62
63
64
65
66
67
68
69
70
71
72
73
const { initializeApp, applicationDefault, cert, } = require ("firebase-admin/app" ); const { getFirestore } = require ("firebase-admin/firestore" );const { push } = require ("./webPush.controller" );const serviceAccount = require ("./firebase-account-file.json" );initializeApp ({ credential : cert (serviceAccount), }); const db = getFirestore ();const setToken = async ({ endpoint, keys } ) => { let isExist = false ; const q = db.collection ("token" ).where ("endpoint" , "==" , endpoint); const querySnapshot = await q.get (); querySnapshot.forEach ((doc ) => { if (doc.id ) { isExist = true ; } }); if (!isExist) { const today = new Date (); db.collection ("token" ).add ({ endpoint, keys, regDate : today, }); } }; const deleteToken = async ({ endpoint, keys } ) => { const q = db.collection ("token" ).where ("endpoint" , "==" , endpoint); const querySnapshot = await q.get (); querySnapshot.forEach ((doc ) => { if (doc.id ) { db.doc (`token/${doc.id} ` ).delete (); } }); }; const sendMessage = async ( const registrationTokens = []; const docs = await db.collection ("token" ).get (); docs.forEach ((result ) => { registrationTokens.push ({ ...result.data () }); }); const message = { data : { message : "웹푸쉬!" , }, tokens : registrationTokens.filter ((r ) => r.endpoint ), }; try { push (message); } catch (e) { console .log (e); } return ; }; module .exports = { setToken, sendMessage, deleteToken, };
routes/index.js에서는 webPush 경로로 라우팅 해줍니다.
1
2
3
4
5
6
7
8
9
10
11
const express = require ("express" );const router = express.Router ();router.use (express.urlencoded ({ extended : false })); router.use (express.json ()); const webPush = require ("./webPush.js" );router.use ("/webPush" , webPush); module .exports = router;
마지막으로 routes/webPush.js에서 각 api들을 구현해줍니다.
1
2
3
4
5
6
7
8
9
10
11
12
13
14
15
16
17
18
19
20
21
22
23
24
25
26
27
28
29
30
const express = require ("express" );const { setToken, deleteToken, sendMessage } = require ("../firebase" );const { getVapidKey } = require ("../webPush.controller" );const router = express.Router ();router.use (express.urlencoded ({ extended : false })); router.use (express.json ()); router.get ("/" , async (req, res) => { res.json ({ rtCode : "S" , vapidKey : getVapidKey () }); }); router.post ("/" , (req, res ) => { const { endpoint, keys } = req.body ; setToken ({ endpoint, keys }); res.json ({ rtCode : "S" }); }); router.post ("/delToken" , (req, res ) => { const { endpoint } = req.body ; deleteToken ({ endpoint : decodeURIComponent (endpoint) }); res.json ({ rtCode : "S" }); }); router.post ("/send" , (req, res ) => { sendMessage (); res.json ({ rtoCode : "S" }); }); module .exports = router;
이제 Vue 프로젝트로 이동하여 api 호출을 구현합니다.
npm i --save axios
main.ts로 이동하여 axios를 글로벌하게 사용할 수 있게 등록해줍니다.
1
2
3
4
5
6
7
8
9
10
11
... import axios from 'axios' ;const app = createApp (App );app.config .globalProperties .$axios = axios; app.use (router); app.mount ('#app' );
이제 vite.config.ts로 이동하여 api 서버가 제대로 호출될 수 있도록 server 설정을 해줍니다.
1
2
3
4
5
6
7
8
9
10
11
12
13
14
15
16
export default defineConfig ({ ... server : { port : 3001 , cors : true , proxy : { '/api' : { target : 'http://localhost:3000' , changeOrigin : true , rewrite : (path ) => path.replace (/^\/api/ , '' ), }, }, }, ... });
페이지 랜딩 시 vapidKey 값을 받아와서 셋팅될 수 있도록 합니다.
1
2
3
4
5
6
7
8
9
10
11
12
13
import { onMounted, getCurrentInstance, ref, nextTick } from 'vue' ;const instance = getCurrentInstance ();const vapidKey = ref ('' );onMounted (async () => { const ds = await (instance?.proxy as any).$axios .get ('/api/webPush' ); vapidKey.value = ds.data .vapidKey ; ... })
requestPermission 함수에서 TODO로 남겨놓았던 부분에도 토큰값이 셋팅될 수 있도록 추가해줍니다.
1
2
3
4
5
6
7
8
9
10
11
12
13
14
15
16
17
18
19
20
21
22
23
24
const requestPermission = async ( try { const registration = await navigator.serviceWorker .ready ; const subscription = await registration.pushManager .getSubscription (); if (subscription) { await (instance?.proxy as any).$axios .post (`/api/webPush/delToken` , subscription); buttonText.value = '구독하기' ; subscription.unsubscribe (); } else { const subscription = await registration.pushManager .subscribe ({ userVisibleOnly : true , applicationServerKey : vapidKey.value , }); console .log ('subscription => ' , subscription.toJSON ()); await (instance?.proxy as any).$axios .post ('/api/webPush' , subscription); buttonText.value = '구독 해지하기' ; } } catch (e) { console .error (e.message ); } };
이제 구독 버튼 클릭 시 DB에 토큰이 저장되고 모든 셋팅이 끝났습니다./webPush/send api를 호출하면 웹 푸쉬가 정상적으로 오는 것을 확인할 수 있습니다!
😮 IOS는요?? IOS는 처음에 말씀드린 것과 같이 사파리 16.4 버전 이상에서 동작이 가능하며 PWA로 만들어야합니다.
Vue 프로젝트로 이동하여 public/manifest.json 파일을 만들어줍니다.favicon-generator 사이트에서 만들어주면 편리합니다.
1
2
3
4
5
6
7
8
9
10
11
12
13
14
15
16
17
18
19
20
21
22
23
24
25
26
27
28
29
30
31
32
33
34
35
36
37
38
39
40
41
42
43
44
45
46
47
{ "short_name" : "웹푸쉬" , "name" : "웹푸쉬" , "start_url" : "/" , "id" : "webpush" , "display" : "standalone" , "theme_color" : "#ffc107" , "backgroun_color" : "#ffc107" , "icons" : [ { "src" : "/android-icon-36x36.png" , "sizes" : "36x36" , "type" : "image/png" , "density" : "0.75" } , { "src" : "/android-icon-48x48.png" , "sizes" : "48x48" , "type" : "image/png" , "density" : "1.0" } , { "src" : "/android-icon-72x72.png" , "sizes" : "72x72" , "type" : "image/png" , "density" : "1.5" } , { "src" : "/android-icon-96x96.png" , "sizes" : "96x96" , "type" : "image/png" , "density" : "2.0" } , { "src" : "/android-icon-144x144.png" , "sizes" : "144x144" , "type" : "image/png" , "density" : "3.0" } , { "src" : "/android-icon-192x192.png" , "sizes" : "192x192" , "type" : "image/png" , "density" : "4.0" } ] }
그리고 index.html로 가서 head태그 안에 mainfest파일을 등록해줍니다.
1
2
3
4
5
6
7
8
9
10
11
12
13
14
<!DOCTYPE html > <html lang ="en" > <head > <meta charset ="UTF-8" /> <link rel ="manifest" href ="/manifest.json" /> <link rel ="icon" href ="/favicon.ico" /> <meta name ="viewport" content ="width=device-width, initial-scale=1.0" /> <title > Vite App</title > </head > <body > <div id ="app" > </div > <script type ="module" src ="/src/main.ts" > </script > </body > </html >
이제 실행을 시켜보면 아래와 같이 앱을 다운로드 받을 수 있습니다.
모든 소스코드는 WebPushExample 와 WebPushServerExample 에서 확인하실 수 있습니다.